
admin
How to Care for Wood, Stainless Steel, and Titanium Cutting Boards
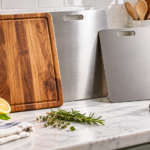
How to Care for Wood, Stainless Steel, and Titanium Cutting Boards
Choosing a cutting board is only half the story.
Once you find a board that fits the way you cook, the next question is pretty simple:
How do I take care of this thing?
Wood, stainless steel, and titanium cutting boards can all give you a useful prep surface, but they don’t necessarily want to be cleaned and maintained the same way.
The good news? Cutting-board care doesn’t have to become another kitchen project.
Here’s what to know.
Start With the Rule That Applies to Every Cutting Board
No matter what your board is made from, start clean and clean it again after use.
The USDA recommends washing cutting boards with hot, soapy water after preparing food, rinsing them, and allowing them to dry. It also recommends keeping raw meat, poultry, and seafood separate from foods such as produce or bread when possible to reduce cross-contamination. Food Safety and Inspection Service
And don’t wait forever to retire a damaged board. Boards that become excessively worn or develop grooves that are difficult to clean should be replaced. Food Safety and Inspection Service
Beyond those basics, the material starts to matter.
Caring for a Wood Cutting Board
Wood has a warm look, feels good under a knife, and can last a long time when it is cared for properly.
The biggest enemy of a wood board is prolonged moisture.
Wash the board soon after using it with warm or hot soapy water, rinse it, and dry it rather than leaving it sitting in a sink full of water.
Pay particular attention to laminated or glued wood boards. USDA guidance notes that laminated boards can crack or split in the dishwasher, so always follow the board maker’s instructions before putting a wood board through a dishwasher cycle. Food Safety and Inspection Service
Once the board is clean, allow air to circulate around it while it finishes drying instead of leaving a damp side pressed flat against the counter.
Many unfinished wood and bamboo boards also benefit from occasional conditioning with a food-safe oil recommended for cutting boards. That helps keep the wood from becoming overly dry.
And remember: your cutting board does not need to smell like tonight’s onions forever. If odors remain after normal washing, consult the board manufacturer before experimenting with strong cleaners or abrasive treatments.
Caring for a Stainless Steel Cutting Board
Stainless steel is considerably less demanding.
Because it is a nonporous surface, it does not need oiling or conditioning. Normally, soap and water are enough for everyday cleanup.
Wash the surface, rinse it well, and dry it to help prevent water spots.
If your stainless board has silicone corners, feet, handles, or another attached material, check its care instructions before assuming the entire board can go into the dishwasher.
Also avoid attacking the surface with extremely abrasive scrubbers just because it’s metal. Scratches may not make the board unusable, but they can affect its appearance.
Stainless steel will show fingerprints, water marks, and the evidence that someone actually cooked dinner. That’s normal. A soft cloth after washing can help restore the cleaner-looking finish.
Caring for a Titanium Cutting Board
Titanium boards are another relatively low-maintenance option.
They don’t require the oiling or conditioning associated with wood, and their nonporous metal surface is designed for straightforward cleaning.
For everyday use, wash with dish soap and water, rinse, and dry.
If your titanium board is sold as dishwasher safe, follow the manufacturer’s instructions for dishwasher cleaning.
That brings us to the partner option for this article.
CookwareTalk Partner Option
Interested in comparing a pure-titanium cutting board?
Titan Haus currently describes its cutting board as Grade 1 pure titanium and says the board is dishwasher safe. The company also publishes independent-material testing information for its product. Those are manufacturer claims and specifications, so readers should review the current product details and policies before purchasing.
CookwareTalk may earn a commission if you purchase through this partner link, at no additional cost to you.
[View the Titan Haus Titanium Cutting Board]
Should You Sanitize a Cutting Board?
Cleaning and sanitizing are not quite the same thing.
Cleaning removes food residue and debris. Sanitizing is an additional step intended to reduce microorganisms.
The USDA says cutting boards can be sanitized after cleaning using a food-contact-safe sanitizer. Its home solution is 1 tablespoon of unscented liquid chlorine bleach in 1 gallon of water, followed by rinsing and drying. Commercial sanitizers should specifically be labeled for food-contact surfaces and used according to their instructions. Food Safety and Inspection Service
You don’t need to turn normal dinner cleanup into a laboratory procedure, but extra attention makes sense after preparing raw meat, poultry, seafood, or other foods that raise cross-contamination concerns.
One Board or More Than One?
You certainly can own one cutting board and clean it thoroughly between jobs.
But there is also a practical argument for having more than one.
USDA recommends considering a separate board for raw meat, poultry, and seafood and another for produce, bread, and foods that will not receive further cooking. Food Safety and Inspection Service
That is less about having a fancy cutting-board collection and more about making cross-contamination harder to do accidentally.
The Best Care Routine Is the One You’ll Actually Use
A cutting board doesn’t need a complicated maintenance ritual.
Wood needs a little more attention to moisture and conditioning.
Stainless steel mainly needs cleaning and drying.
Titanium is designed to be relatively simple to wash and maintain.
Whichever one fits your kitchen, the important part is keeping it clean, letting it dry properly, following the manufacturer’s instructions, and recognizing when a worn board has reached the end of its useful life.
And if you haven’t figured out which material fits your kitchen yet, that’s what our 5-question CookwareTalk Cutting Board Quiz is for.
Grill, Portable Stove, or Camp Cooker? Choosing an Outdoor Cooking Setup

Affiliate disclosure: CookwareTalk may earn a commission if you purchase through some links in this article, at no additional cost to you. Affiliate relationships do not determine our editorial conclusions.
You can cook outdoors with a $40 single-burner stove, a two-burner camp kitchen, a high-heat grill, a pizza oven, or a compact backpacking cook system.
That is the good news.
The bad news is that shopping gets confusing fast if you start with products instead of meals.
So before you ask, “Which cooker should I buy?” ask a better question:
What do I actually want to cook, for how many people, and how far do I have to carry the equipment?
Choose a portable camp stove if you want familiar pan cooking outdoors
A portable propane or butane stove is the closest thing to moving part of your kitchen range outside. Put a pot or skillet on top and you can boil, simmer, sauté, or make breakfast without building a fire.
This is a strong fit for:
- car camping;
- picnics and tailgates where fuel stoves are permitted;
- breakfasts with eggs, pancakes, or a skillet meal;
- people who already own cookware they like using outdoors;
- cooks who want adjustable heat instead of managing charcoal or wood.
A two-burner model gives you more flexibility for group meals. A one-burner model saves space and works well for simpler cooking.
Choose a grill if the flame-and-sear experience is the point
If your outdoor menu starts with burgers, steaks, kebabs, grilled vegetables, or food you specifically want exposed to grill-style heat, a portable grill may make more sense than a small stove.
Grills generally trade some portability and fine saucepan control for a larger direct-cooking surface and a more familiar barbecue experience.
That can be perfect for the backyard or car camping. It is less appealing if you have to carry every ounce on foot.
Choose a compact cook system if packability matters most
Backpacking-style stoves and integrated cook systems prioritize compact storage, lower weight, and fast heating of water or simple meals. Fire Maple, for example, currently sells ultralight canister stoves, one-liter integrated systems, larger basecamp stoves, and flat-pack wood stoves.
This type of setup can make more sense when your goal is coffee, oatmeal, soup, noodles, dehydrated meals, or one-pot cooking rather than a campsite brunch for six.
What about outdoor pizza ovens and specialty cookers?
Specialty equipment earns its space when the cooking style itself is the attraction.
A pizza oven is not the most efficient choice for boiling water. A backpacking burner is not the most comfortable choice for cooking six pancakes at once. A high-heat grill is overkill if your entire plan is morning coffee.
The right question is not “Which cooker is the most impressive?”
It is “Which one makes the food I actually plan to cook easier?”
Fast decision guide
| If you care most about… | Start with… |
|---|---|
| Breakfast, skillets, pots, and two dishes at once | Two-burner portable camp stove |
| Compact one-pan meals or boiling water at a picnic | Single-burner stove |
| Backpacking weight and packability | Compact canister stove or integrated cook system |
| Burgers, steaks, kebabs, grill marks | Portable grill |
| Pizza nights as the main event | Portable pizza oven |
| Backyard entertaining with lots of cooking space | Larger outdoor grill or cooking station |
Fuel matters as much as the cooker
Before buying, check what fuel the unit requires, how easily you can buy that fuel where you travel, and what the campground or public land allows.
Propane, butane, isobutane canisters, pellets, charcoal, and wood all create different packing, storage, ignition, and restriction considerations.
Do not assume that because a cooker is portable it is permitted everywhere.
Outdoor cooking safety is not optional
The National Park Service recommends checking conditions and restrictions, keeping portable stoves clear of grasses and other vegetation that could ignite, preventing stoves from tipping, and never leaving fire unattended.
Fuel-burning camping stoves and grills should be used in appropriate outdoor areas according to the manufacturer’s instructions. Do not operate a propane or other fuel-burning camp stove inside a tent, vehicle, garage, or other enclosed space.
Practice with a new stove before the trip. NPS specifically recommends trying a new camp stove ahead of time so you are not learning ignition, assembly, or fuel connection while hungry at the campsite.
CookwareTalk Partner Option: Big Horn Outdoors
If you are a car camper, tailgater, backyard cook, or group-meal person, Big Horn Outdoors currently offers portable propane and butane camping stoves as well as grills and outdoor pizza ovens.
CookwareTalk Partner Option: Fire Maple
If you care more about compact camping stoves, backpacking cook systems, or lightweight outdoor cookware, Fire Maple offers a broad range of canister stoves and integrated systems.
Explore Fire Maple Camping Gear
Partner note: Product availability, specifications, prices, fuel requirements, and fire restrictions can change. Confirm the manufacturer’s current instructions and the rules for your destination before buying or using outdoor cooking equipment.
CookwareTalk bottom line
Buy for the meal and the trip—not for the gear photo.
If you are driving to a campsite and feeding four people, a two-burner stove may make you happier than an ultralight burner. If you are carrying everything on your back, the opposite may be true.
Start with meal style, group size, carry distance, fuel, and local rules. Once those five things are clear, the equipment list gets much shorter.
Sources & Learn More
Kitchen Germs: What Actually Needs Cleaning—and What Are We Overthinking?
CookwareTalk note: This article is general food-safety information, not medical advice. People at higher risk for serious foodborne illness should follow guidance from their healthcare professional and public-health authorities.
Some kitchen habits deserve our attention.
Others mostly deserve to stop living rent-free in our heads.
You do not need to turn dinner cleanup into a surgical scrub. You do need to pay attention to the places where raw-food juices, dirty hands, utensils, and ready-to-eat foods can cross paths.
The simplest framework comes from CDC: Clean. Separate. Cook. Chill.
What actually deserves your cleaning energy?
1. Your hands
Wash your hands before food prep and after handling raw meat, poultry, seafood, eggs, or other messy ingredients. CDC recommends washing for at least 20 seconds with soap and water.
This sounds basic because it is basic—and basic is powerful.
2. Cutting boards and knives after risky foods
If a board just held raw chicken, it should not become the tomato board without a wash in between. USDA recommends hot, soapy water after each use and specifically advises using separate boards for raw meat, poultry, and seafood and ready-to-eat foods when possible.
That separation is not about owning a rainbow-colored set of seven boards. It is about keeping raw juices away from foods that will not get cooked later.
3. Countertops and handles you touched with messy hands
If you opened a package of raw meat, touched a faucet handle, grabbed a spice jar, then went back to cooking, those touch points are worth remembering. Cross-contamination often happens through the route your hands take around the kitchen.
Clean food-contact surfaces and obvious touch points with warm or hot soapy water as appropriate for the surface.
4. The sink after raw-food cleanup
The sink is not a magical germ disposal portal. USDA notes that washing raw meat or poultry can spread bacteria through splashing, including around the sink and nearby surfaces.
If raw juices have been in the sink, clean the sink and surrounding area rather than assuming running water took care of everything.
What should you NOT wash?
Please stop washing raw chicken
USDA does not recommend washing raw poultry before cooking. Splashing water can spread bacteria to food, utensils, countertops, and the sink. Rinsing does not destroy the bacteria; proper cooking does.
Chicken should reach a safe internal temperature of 165°F, measured with a food thermometer.
So the safer routine is: package to prep, prep to heat, then wash the surfaces and tools that touched it.
Cleaning and sanitizing are not the same thing
USDA makes a useful distinction:
- Cleaning removes food, grease, dirt, and some germs.
- Sanitizing is an additional step designed to reduce or kill more germs on a cleaned surface.
And the order matters: clean first, then sanitize when sanitizing is appropriate.
For an ordinary home meal, routine washing with soap and water does a lot of the heavy lifting. After raw meat, poultry, seafood, illness in the household, or another higher-risk mess, you may choose an appropriate food-contact sanitizer following its label directions and the material maker’s care instructions.
Never mix cleaning chemicals. More chemical is not automatically more clean.
What are we probably overthinking?
“I need to disinfect the entire kitchen after making a sandwich.”
Probably not. Focus your effort where contamination actually occurred.
“A nonporous cutting board means I can stop worrying about cross-contamination.”
No. Nonporous surfaces can be straightforward to clean, but they still need to be washed after use. Material choice does not replace good handling.
“Wood is automatically unsafe for raw meat.”
USDA says consumers may use wood or nonporous boards for raw meat and poultry. The critical steps are proper cleaning and preventing raw-food juices from reaching ready-to-eat foods.
“If I cannot smell anything, it must be clean.”
Smell is not a food-safety test. A surface can look and smell normal and still need cleaning because of what touched it.
A calmer kitchen routine
Try this instead of mentally scanning every inch of the room for invisible enemies:
- Start with clean hands and a reasonably clean work area.
- Keep raw animal foods separate from ready-to-eat foods.
- Wash the tools and surfaces that actually touched raw food.
- Use a food thermometer instead of guessing doneness.
- Refrigerate perishables promptly.
- Replace cutting boards that develop deep, hard-to-clean grooves.
That is a lot more useful than panic-cleaning the spice cabinet because chicken existed somewhere in the room.
CookwareTalk bottom line
A safe kitchen does not have to be a sterile kitchen.
Pay attention to hands, raw-food juices, food-contact surfaces, separation, safe cooking temperatures, and refrigeration. Those are the habits public-health guidance keeps returning to for a reason.
Clean what got dirty. Separate what can cross-contaminate. Cook what needs cooking. Chill what needs chilling.
Then enjoy your dinner.
Keep reading on CookwareTalk
If cutting-board material is part of what you are deciding, compare the tradeoffs in Wood vs. Stainless Steel vs. Titanium Cutting Boards: Which Fits Your Kitchen?
Sources & Learn More
Wood vs. Stainless Steel vs. Titanium Cutting Boards: Which Fits Your Kitchen?
Affiliate disclosure: CookwareTalk may earn a commission if you purchase through some links in this article, at no additional cost to you. Recommendations and tradeoffs are based on product fit and available evidence, not on which offer pays a commission.
Three cutting boards can all be washable, durable, and useful—and still feel completely different in your kitchen.
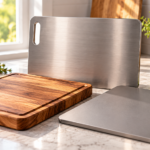
Wood gives you a softer, classic cutting surface. Stainless steel gives you a hard, nonporous work surface with very little routine care. Titanium aims for a similar low-maintenance metal experience with less weight than many steel boards.
So which one is “best”?
That depends on what you care about enough to notice every single day.
Quick comparison
| Priority | Wood | Stainless steel | Titanium |
|---|---|---|---|
| Knife friendliness | Strongest of these three | Hard surface; expect faster edge wear | Hard metal surface; less forgiving than wood |
| Routine upkeep | Needs drying and, for many boards, periodic oiling | Low | Low; follow the maker’s care instructions |
| Nonporous surface | No | Yes | Yes |
| Weight/handling | Varies widely | Can feel substantial or heavy | Can be lighter than steel, depending on size and construction |
| Classic counter look | Strong | Industrial/modern | Modern/minimal |
Wood: the knife-friendly traditionalist
If protecting your knife edge is your biggest concern, wood has a strong case.
Knife-care guidance from WÜSTHOF specifically recommends avoiding hard cutting surfaces such as metal, glass, and very hard boards because they can dull an edge faster. Wood or other blade-friendly surfaces are the safer everyday choice when edge retention is a priority.
Wood also has a warmer look and a little more give under the knife. That feel is one reason many cooks simply enjoy chopping on it.
The tradeoff is care. Wood should not be left sitting wet. Many wooden boards benefit from periodic food-safe mineral oil or whatever maintenance the manufacturer recommends. A good board can last a long time, but it asks you to participate in that relationship.
But can wood be used for raw meat?
Yes. USDA says consumers may use either wood or a nonporous board for raw meat and poultry. The bigger food-safety issue is cross-contamination: use a separate board for raw meat, poultry, and seafood when possible, or thoroughly wash the board with hot, soapy water before it touches ready-to-eat foods.
Stainless steel: sturdy, low-upkeep, and hard on edges
Stainless steel is attractive to cooks who want a nonporous surface that does not need oiling or conditioning. It can be wiped and washed without the moisture concerns that come with wood.
But the same hard, unyielding surface that makes steel easy to maintain is not gentle on a knife edge. If you use expensive thin-bladed knives and hate sharpening, stainless is probably not your everyday chopping-board soulmate.
For some households, a metal board still makes sense as a dedicated prep surface—especially when low upkeep matters more than maximum edge retention. Just go into the choice understanding the tradeoff.
Titanium: low upkeep and lighter handling—with a knife tradeoff
Titanium cutting boards have become popular because the material is nonporous, corrosion-resistant, and can be relatively light for a metal board depending on the board’s size and construction. They do not require wood-style oiling.
The important part CookwareTalk will not skip: titanium is still a metal cutting surface. Independent testing and knife-care guidance have raised concerns about faster edge wear compared with wood or softer boards, so knife feel and edge maintenance are worth considering before choosing any metal cutting board.
That does not make titanium useless. It means the reason to choose it should be something you genuinely value—such as low upkeep, nonporous construction, or lighter handling—not a belief that it has no tradeoffs.
Which material fits which cook?
Choose wood if:
- protecting your knife edge is near the top of your list;
- you like a warmer, traditional cutting surface;
- you are willing to dry and maintain the board properly.
Consider stainless steel if:
- you want a sturdy metal prep surface;
- very low routine upkeep matters more than knife-edge preservation;
- you are comfortable honing or sharpening more often.
Consider titanium if:
- you want a low-maintenance metal board;
- lighter handling matters to you;
- you understand that a rigid metal surface can be less forgiving on knives than wood.
Food safety: material is only part of the story
No cutting-board material replaces basic kitchen habits. CDC’s core food-safety steps are Clean, Separate, Cook, and Chill. USDA recommends washing cutting boards with hot, soapy water after each use and replacing boards that become excessively worn or develop hard-to-clean grooves.
If you prepare raw meat, poultry, or seafood, separating that work from foods such as salad ingredients matters more than chasing a “germ-proof” material label.
CookwareTalk Partner Option: Titan Haus Titanium Cutting Board
If your quiz or your own priorities point toward titanium, Titan Haus is a current CookwareTalk affiliate option to compare.
See Titan Haus Titanium Cutting Board
Affiliate disclosure: CookwareTalk may earn a commission if you purchase through this link, at no additional cost to you. The affiliate relationship does not determine our quiz scoring or editorial conclusions.
Not sure which one sounds like you?
Take the CookwareTalk 5-question Cutting Board Match Quiz. It compares your cleanup preferences, knife priorities, upkeep tolerance, durability concerns, and handling preference before giving you a result.
Keep reading on CookwareTalk
Wondering how much the board material itself matters for food safety? Read Kitchen Germs: What Actually Needs Cleaning—and What Are We Overthinking?
Sources & Learn More
Why Does Food Stick to Stainless Steel? The Heat Mistake Most Home Cooks Make
Affiliate disclosure: CookwareTalk may earn a commission from some links on this site at no additional cost to you. Affiliate relationships do not determine our editorial conclusions.
You bought a shiny stainless-steel pan. You heated it up, dropped in a piece of chicken, and five seconds later the chicken appeared to have signed a lifetime lease with the skillet.
That does not automatically mean the pan is bad.
Stainless steel simply behaves differently from a coated nonstick pan. It rewards a little temperature control, enough cooking fat, dry food, and—this is the part many of us hate—patience.
The short answer: sticking usually starts before the food hits the pan
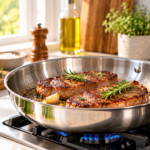
Two major stainless-steel cookware makers, All-Clad and Made In, give very similar advice: preheat the pan over low-to-medium or medium heat, add oil after the pan is hot, let the oil heat, then add food. They also recommend drying food before cooking and waiting until proteins naturally release before trying to turn them.
In plain CookwareTalk language: pan first, oil second, food third.
Mistake #1: starting with a cold pan
If food goes into stainless steel before the pan is properly preheated, it is more likely to grab the surface. Give the pan a little time to warm evenly instead of racing straight from burner-on to food-in.
All-Clad recommends low to moderate heat for preheating. Made In commonly suggests medium heat for a few minutes. Your exact burner and pan will differ, so think of those as starting points rather than stopwatch rules.
The water-drop clue
One common readiness check is a few drops of water. On a properly heated stainless surface, the drops can bead and move across the pan instead of immediately disappearing. You do not need to turn this into a chemistry experiment. It is simply a visual clue that the pan has warmed up.
Important: do the water check before adding oil. Do not toss water into a pan that already contains hot oil.
Mistake #2: using too little fat—or adding food before the fat is hot
Once the pan is preheated, add enough oil or other cooking fat to lightly coat the area where the food will sit. Give that fat a moment to warm. Oil that shimmers is a useful visual cue; oil that is aggressively smoking means the pan may be hotter than you need.
Stainless steel is not trying to imitate a brand-new coated skillet with no added fat. A modest amount of cooking fat is part of the technique.
Mistake #3: putting wet food into the pan
Moisture fights browning. Pat the surface of meat, fish, tofu, or other foods dry when the recipe allows. That helps the food make better contact with the pan and reduces splattering.
For frozen or refrigerator-cold proteins, follow your recipe and food-safety needs, but know that a very cold, damp surface can make clean searing harder.
Mistake #4: trying to flip too soon
This may be the hardest stainless-steel lesson: stop poking the food.
When a protein is browning properly, it can cling at first and then release more easily as the cooked surface develops. If your spatula meets serious resistance, give the food another moment instead of scraping it loose immediately.
All-Clad specifically notes that food on stainless steel is ready to turn when it no longer sticks strongly to the pan.
Mistake #5: overcrowding the skillet
A pan full of cold food can lose heat quickly. Crowding also traps steam. Instead of browning, the food can sit in released moisture and cook unevenly.
If you are chasing a good sear, leave breathing room. Two batches are often faster than one overloaded batch that never browns the way you wanted.
What about eggs?
Eggs are a higher-skill stainless-steel test because they are delicate and protein-rich. They usually need closer control of heat and enough butter or oil. If eggs are your main breakfast and you do not enjoy managing pan temperature, it is completely reasonable to use a different pan for that job.
CookwareTalk is not here to declare that one material must perform every kitchen task.
The 5-step stainless-steel reset
Preheat gently. Start around low-to-medium or medium heat, depending on your pan and burner.
Dry the food. Remove excess surface moisture when appropriate.
Add the fat after preheating. Let it warm until it looks fluid and shimmery.
Add food and listen. A steady sizzle is better than silence or an explosive crackle.
Wait for release. Let browning do its job before forcing the flip.
When sticking is actually useful
Those browned bits left in the pan after searing are called fond, and they can be the beginning of a very good pan sauce. After the food comes out, liquid such as stock can loosen the browned bits while the pan is still warm. That is one of the reasons cooks love stainless steel in the first place.
CookwareTalk bottom line
If everything sticks to your stainless-steel pan, do not replace the pan first. Change the sequence first.
Preheat. Add fat. Add dry food. Then give it time.
If that solves the problem, congratulations: the pan was not broken. It was just waiting for the two of you to learn each other’s language.
Keep reading on CookwareTalk
If you want to see why pan material matters with acidic foods, read I’m a Tomato. Why Are You Cooking Me in THAT Pan? 🍅
Sources & Learn More
I’m a Tomato. Why Are You Cooking Me in THAT Pan? 🍅


Meet Tammy the Tomato
Excuse me.
Yes, you.
Before you dump me into that pan, I have a question.
Do you know what I’m actually touching?
I’m Tammy the Tomato. I’m juicy, delicious and just acidic enough to make your choice of cookware worth thinking about.
I’m not trying to make dinner complicated.
I’m trying to keep you from grabbing a pan simply because it happens to be clean.
Different cookware materials behave differently depending on the food, the condition of the cookware and how it is used. Health Canada notes that all three of those factors can affect how substances from cookware transfer into food.
So before we make that spaghetti sauce, let’s take a quick tour of the cookware cabinet.
Stainless Steel: “Okay, We Can Work Together.”
Stainless steel is strong, long-lasting and resistant to rust and staining.
It is generally made from iron combined with other metals, including chromium. That chromium helps form the thin protective surface layer that gives stainless steel its corrosion resistance.
For a home cook making tomato sauce, soup or chili, stainless steel is a practical material to understand because it does not rely on an applied nonstick coating to form its cooking surface.
There is a catch, though.
Stainless steel wants you to learn your heat.
Food sticking to stainless steel can have as much to do with cooking technique as the pan itself. Preheating, burner temperature and when food goes into the pan all matter.
And that is a conversation Stella Stainless is going to insist we have very soon.
Tammy says:
“I’m willing to simmer. I’m not volunteering to be scorched to the bottom of your pot.”
Cast Iron: “I Like You. But Maybe Not for an All-Day Date.”
Cast iron is durable, versatile and excellent at holding heat.
But Tammy and an uncoated cast-iron pan may need some boundaries.
Health Canada specifically recommends avoiding cooking or storing acidic foods such as stewed tomatoes in uncoated cast iron for long periods.
That does not mean one tomato touching a cast-iron skillet causes a kitchen emergency.
The important words are acidic food and long periods.
A quick recipe containing tomatoes is different from simmering tomato sauce for several hours.
So for the long relationship?
Tammy may want another pan.
Tammy says:
“You’re wonderful, Cast Iron. I just don’t think we should spend the whole afternoon together.”
Aluminum: “Wait. What Kind of Aluminum Are We Talking About?”
Aluminum is a popular cookware material for good reasons.
It is lightweight, relatively inexpensive and conducts heat well.
But acidic foods deserve more attention when ordinary aluminum is the food-contact surface.
Health Canada says foods high in acid or salt — including tomatoes, citrus products and sauerkraut — can increase the transfer of material from aluminum cookware into food. It recommends avoiding cooking or storing highly acidic foods in ordinary aluminum cookware for long periods.
But here is where understanding cookware construction matters.
Anodized aluminum is different.
Anodizing creates a harder surface and reduces the transfer of aluminum from cookware into food, particularly acidic foods such as tomatoes.
So simply asking:
“Is this an aluminum pan?”
may not tell you enough.
CookwareTalk would rather ask:
What is the actual cooking surface?
That is one of the most useful questions you can learn to ask about any piece of cookware.
Tammy says:
“Read the pan, people. I cannot do everything around here.”
Copper: “Please Keep Your Jacket On.”
Copper cookware is valued because copper conducts heat extremely well.
But bare copper is reactive.
That is why copper cookware intended for cooking is commonly lined with another material that separates the copper from the food. Health Canada advises against using scratched or uncoated copper cookware for cooking or storing food and recommends replacing a damaged inner coating.
There is also a useful regulatory example from the U.S. FDA Food Code. In commercial food-service settings, copper and copper alloys generally may not contact foods with a pH below 6, such as vinegar, fruit juice and wine.
So if Tammy sees a beautiful copper pot, she isn’t asking whether the outside looks impressive.
She wants to know:
What is lining the inside?
Tammy says:
“Nice copper. Very pretty. Now show me the part I’m actually cooking on.”
Titanium: “Okay… But What Does ‘Titanium’ Mean Here?”
Here is where cookware shopping can get confusing.
The word titanium on a product does not necessarily mean the entire pan is made from one solid piece of titanium.
Cookware may combine several materials, with each layer serving a different purpose.
So when a pan is marketed with titanium, CookwareTalk would still ask the same question:
What is the actual cooking surface, and how does the manufacturer describe the pan’s construction?
That is part of learning to read cookware instead of relying on one big word on the package.
Stainless steel is a practical, nonreactive choice for tomato sauces and other acidic foods. Choose a skillet or saucepan that fits what you cook most often. You don’t need an entire cookware set!
Want Stainless Steel to Behave Better?
Tammy already warned us that stainless steel wants you to learn your heat. If you have ever wondered why eggs, fish, or other foods suddenly seem glued to a stainless-steel pan, continue with our next guide:
🍳 Read Next: Why Does Food Stick to Stainless Steel? The Heat Mistake Most Home Cooks Make
So What Pan Should Tammy Choose?
Here is the bigger lesson.
You do not need to memorize an enormous chart of cookware materials before making dinner.
Start with three questions:
- What surface is actually touching my food?
- What kind of food am I cooking?
- Am I using and caring for this cookware the way the manufacturer intended?
Those questions give you a much more useful framework than simply deciding a material is always “good” or always “bad.”
That is exactly what CookwareTalk is here to help you figure out.
Tammy’s Final Word 🍅
See?
I wasn’t being difficult.
I was being educational.
The next time you open a can of crushed tomatoes, squeeze a lemon or add a splash of vinegar, take a second before reaching for the nearest pan.
Look at the cooking surface.
Think about the food.
Then cook.
And if you happen to make spaghetti sauce after reading this?
Tammy would like credit.
Now please put me in the sauce. I’ve been waiting through this entire article.