
admin
Stainless Steel vs. Ceramic Cookware: Which Is Better for Your Kitchen?
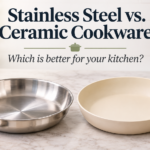
If you’re shopping for a new pan, stainless steel and ceramic-coated cookware can both look appealing, but they behave differently on the stove. Understanding their differences can help you choose what fits your cooking style.
In this comparison, ceramic cookware refers to ceramic-coated metal pans, not cookware made entirely from ceramic.
Stainless Steel Cookware: Pros and Cons
Stainless steel cookware is known for durability. Many quality pans have an aluminum or copper core to help distribute heat. Unlike coated nonstick pans, stainless steel doesn’t depend on a nonstick coating that gradually wears away.
It’s particularly useful for browning, searing, and preparing pan sauces. However, there’s a learning curve. Food can stick when the pan isn’t properly preheated or the cooking temperature isn’t managed carefully.
Ceramic-Coated Cookware: Pros and Cons
Ceramic-coated cookware usually has a metal body covered with a smooth, nonstick-style coating. It’s popular for cooking delicate foods, such as eggs, with relatively easy food release when the coating is in good condition.
But ceramic coatings can lose their nonstick performance over time. Overheating, abrasive cleaning, and rough utensils may accelerate wear. Those marks that look like scratches might be utensil transfer, stubborn residue, or actual coating damage.
Cleaning requirements also differ. Uncoated stainless steel generally tolerates more vigorous cleaning, while ceramic-coated pans benefit from gentle detergents, soft sponges, and careful storage.
Which Cookware Should You Choose?
Stainless steel may be the better long-term choice if durability, versatility, and browning performance matter most.
Ceramic-coated cookware may appeal to someone who prioritizes easier food release and doesn’t mind taking extra care of the coating.
Before purchasing either, consider your budget, cooking habits, stovetop compatibility, and the manufacturer’s care instructions.
The best cookware isn’t necessarily the most expensive or the most advertised. It’s the cookware that performs well for the meals you prepare and fits the way you actually cook.
Baking Pan Conversion Chart: Easy Substitutions for Common Pan Sizes
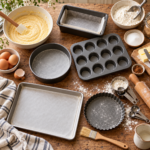
Ever start a recipe only to discover that you don’t have the baking pan it calls for? Before changing your plans or buying another pan, check the Baking Pan Conversion Chart below ↓ to find out whether a pan you already have in your kitchen might work.
And if you’d rather skip the math, try our FREE Pan Swaps Calculator →.
Baking Pan Conversion Chart
This quick-reference chart compares common baking pans by the area across their bottoms.
| Baking pan | Bottom area (sq. in.) | Similar-size alternative |
|---|---|---|
| 8-inch round | 50.3 | No exact common match; adjust batter if needed |
| 8 × 8-inch square | 64 | 9-inch round |
| 9-inch round | 63.6 | 8 × 8-inch square |
| 11 × 7-inch rectangle | 77 | 9 × 9-inch square, with a small difference |
| 9 × 9-inch square | 81 | 11 × 7-inch rectangle |
| 10-inch round | 78.5 | 9 × 9-inch square, with a small difference |
| 9 × 13-inch rectangle | 117 | Two 9-inch round pans, if appropriate for the recipe |
Important: These are bottom-area comparisons, not guarantees of equal batter capacity. Pan depth, shape, and recipe requirements matter.
How Do Baking Pan Conversions Work?
For a square or rectangular pan, multiply the length by the width.
For example:
8 × 8 = 64 square inches
For a round pan, the calculation uses the radius (half the diameter):
Area = 3.14 × radius × radius
A 9-inch round pan has an approximate bottom area of 63.6 square inches.
That’s why an 8-inch square pan and a 9-inch round pan are often good substitutes when they have similar depths.
But what happens when the sizes aren’t so close?
Example: Can You Replace a 9 × 13 Pan With a 9-Inch Round?
A 9 × 13-inch pan has 117 square inches of bottom area. One 9-inch round pan has only about 63.6.
That’s a substantial difference!
Putting the entire recipe into one round pan could leave you with too much batter, especially if the original recipe already fills its pan generously.
Two 9-inch round pans have a combined bottom area of approximately 127.2 square inches, making them a more reasonable alternative for many layer-cake recipes.
Just remember that the baking time and cake thickness may change.
Watch Out for Batter Overflow Risks
Pan substitutions aren’t only about whether the batter physically fits inside the pan.
Many cakes rise during baking, so they need room above the batter.
For many standard cake recipes, a useful general guideline is to fill the pan approximately halfway to two-thirds full, unless the recipe provides different instructions.
Here’s an example.
Suppose your original 9 × 13-inch pan would be about two-thirds full. If you poured the same amount of batter into a similarly deep 9-inch round pan, the estimated fill could exceed 100%.
That means the substitute pan is too small for the full batch.
Don’t fill it to the rim and hope for the best! Divide the batter among suitable pans or adjust the recipe quantity.
Also remember that a smaller pan may need more baking time, while a larger pan may produce a thinner cake that bakes more quickly.
Does Pan Material Matter?
Absolutely!
Metal, glass, and ceramic baking pans transfer heat differently. Dark-colored metal pans may brown edges more quickly, while glass and ceramic can heat and cool differently from metal.
When changing both the pan size and the material, follow your recipe’s recommendations and monitor doneness carefully.
For recipes that depend on a particular pan shape—such as certain cheesecakes, Bundt cakes, or rolled sponge cakes—a simple area comparison may not be enough.
Let Our Free Calculator Do the Comparing!
We’ve created a free interactive tool to help take the guesswork out of choosing a substitute baking pan.
Our CookwareTalk Pan Swaps Calculator lets you:
- Choose the pan specified in your recipe.
- Select the pan you have available.
- Compare their bottom areas.
- Estimate recipe quantity adjustments.
- See approximately how full your substitute pan might become.
- Receive a warning when your proposed substitution may lead to overfilling.
OPEN THE FREE PAN SWAPS CALCULATOR →
The next time you’re ready to bake and discover you’re missing the right pan, don’t give up on your recipe. Check the measurements, consider the pan depth, and see whether a simple substitution will work.
Happy baking from CookwareTalk!
References & Further Reading
For additional information about baking pan sizes and substitutions, explore these helpful resources from King Arthur Baking:
Don’t Have the Right Baking Pan? Try Our Free Pan Swaps Calculator
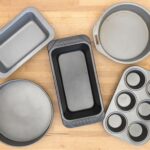
Ever start baking and discover your recipe calls for a pan you don’t have? Maybe you need an 8-inch square pan, but all you have is a 9-inch round.
Before changing your recipe or buying another pan, try our FREE Pan Swaps Calculator!
What Does the Pan Swaps Calculator Do?
Our free interactive tool helps you compare different baking pan sizes so you can make a more informed substitution.
You can:
- Compare round, square, rectangular, and loaf pans.
- See the difference in pan bottom area.
- Estimate how much to adjust your recipe quantity.
- Check approximately how full your substitute pan may be.
- Get a warning if your chosen pan might be too small for the batter.
Here’s an Example
An 8 × 8-inch square pan has 64 square inches of bottom area. A 9-inch round pan has approximately 63.6 square inches.
That’s a difference of less than 1%!
If both pans have similar depths, they’re often reasonable substitutes for the same amount of batter.
But remember, pan material, depth, recipe ingredients, and baking time can all affect your results.
Shopping for a New Baking Pan?
Sometimes the pan you already own is a great substitute. Other times, adding a different size to your bakeware collection makes sense.
Look for bakeware that fits your favorite recipes, is easy to handle, and has the size and depth you actually need.
Ready to Find Your Pan Swap?
OPEN THE FREE PAN SWAPS CALCULATOR →
Select the pan your recipe calls for, choose the one you have available, and compare the results.
Happy baking!
CookwareTalk.com
Cutting Board Sliding on Your Counter? 4 Simple Fixes Before You Replace It
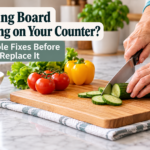
Ever tried chopping an onion or slicing vegetables, only to have your cutting board slide across the counter?
It’s annoying, but it’s also a safety concern. A board that moves unexpectedly can make it harder to control your knife.
The good news? You may not need a new cutting board. Before replacing yours, try these four simple fixes.
1. Put a Damp Towel Underneath
One of the easiest solutions may already be sitting in your kitchen.
Take a clean kitchen towel or paper towel, dampen it slightly, and wring out the extra water. Lay it flat on your countertop and place your cutting board on top.
The towel creates friction that can help prevent the board from sliding.
Quick tip: Use a damp towel, not a soaking-wet one. Make sure it lies flat without bunching up underneath the board.
2. Try a Non-Slip Mat
If your board moves frequently, consider placing a washable, non-slip kitchen mat underneath it.
A thin silicone or rubber gripping mat can help stabilize your cutting surface without permanently modifying your board.
Choose one that lies flat, stays in place, and is easy to clean.
3. Check the Board Itself
Sometimes the problem isn’t your countertop.
Look underneath your cutting board. Does it have rubber feet? Are any missing or worn down? Is the board warped or uneven?
A cutting board that rocks, wobbles, or refuses to sit flat may need replacing.
Before chopping, place it on the counter and gently test whether it moves.
4. Consider Size, Weight, and Handling
A lightweight board can be convenient to lift and wash, but it still needs to remain stable during food preparation.
A heavier board isn’t automatically better, either.
Think about how comfortably you can lift, carry, wash, and store the board. The ideal choice balances stability with ease of handling.
Remember: If your cutting board starts moving while you’re using a knife, stop and stabilize it before continuing.
A Quick Word About Cleaning
Whichever board you use, remember to clean it after preparing food.
The USDA recommends washing cutting boards with hot, soapy water after use, rinsing, and drying thoroughly. Using separate boards for raw meat and ready-to-eat foods can also help reduce cross-contamination.
For more guidance, read our Cutting Board Care Guide.
Is It Time for a Different Cutting Board?
If your current board is difficult to handle, uncomfortable to use, or no longer stable, it might be time to compare your options.
Wood, stainless steel, and titanium cutting boards have different characteristics, and the best fit depends on what matters most in your kitchen.
Not sure which one suits you?
Visit CookwareTalk.com and take our free five-question cutting-board quiz to discover your match!
18/10 vs. 18/8 vs. 18/0 Stainless Steel Cookware: What Do the Numbers Mean?
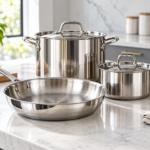
18/10 vs. 18/8 vs. 18/0 Stainless Steel Cookware: What Do the Numbers Mean?
If you have ever looked at the bottom of a stainless steel pan and wondered what numbers like 18/10, 18/8, or 18/0 mean, you are not alone.
They are not sizes or quality scores. The numbers refer to the approximate amounts of chromium and nickel used in the stainless steel.
Those ingredients affect characteristics such as corrosion resistance, appearance, and magnetism. But the numbers are only part of the story when choosing cookware.
What Do 18/10, 18/8, and 18/0 Mean?
The first number refers to the approximate percentage of chromium.
The second refers to the approximate percentage of nickel.
So, generally:
| Stainless Steel | Chromium | Nickel | What Home Cooks Should Know |
|---|---|---|---|
| 18/10 | About 18% | About 10% | Common in quality kitchenware and valued for corrosion resistance |
| 18/8 | About 18% | About 8% | Very similar to 18/10 and commonly used in kitchen products |
| 18/0 | About 18% | Little or no nickel | More magnetic and often useful for induction-compatible cookware |
These labels are useful, but they do not tell you everything about the pan.
What Does Chromium Do?
Chromium is an important part of what makes stainless steel resist corrosion.
It helps create a thin protective layer on the metal surface. That is one reason stainless steel is so useful in kitchens, where cookware regularly comes into contact with water, salt, food acids, and heat.
Stainless does not mean completely stain-proof, however. Improper cleaning, prolonged exposure to salt, or harsh chemicals can still affect the surface.
What Does Nickel Do?
Nickel helps improve corrosion resistance and contributes to the smooth, durable finish associated with many stainless steel kitchen products.
That is why 18/8 and 18/10 stainless steels are commonly found in cookware, flatware, mixing bowls, and other kitchen equipment.
But more nickel does not automatically mean a pan will cook better.
The way the entire pan is constructed matters too.
Is 18/10 Better Than 18/8?
For most home cooks, the difference between 18/10 and 18/8 is not something I would use as the sole reason to choose one pan over another.
Both can be good choices for kitchen use.
Instead, look at the whole piece of cookware:
- Is it fully clad?
- What material is inside the core?
- How heavy is the pan?
- Is the handle comfortable?
- Does it work with induction?
- How well does the manufacturer explain its construction?
- Is there a good warranty?
A well-designed 18/8 pan may be a much better purchase for you than a poorly designed pan simply labeled 18/10.
What About 18/0 Stainless Steel?
The zero means the steel contains little or no nickel.
One useful characteristic of many nickel-free stainless steels is that they are more magnetic.
That matters because induction cooktops require cookware with a magnetic-compatible base or exterior.
This is why a stainless steel pan may contain more than one type of stainless steel.
The cooking surface can be designed for durability and corrosion resistance, while the exterior layer helps make the pan compatible with induction.
Why Does Clad Construction Matter?
Stainless steel is durable, but it is not especially good at distributing heat by itself.
That is why many stainless steel cookware manufacturers bond stainless steel to a more heat-conductive material such as aluminum.
You may see terms such as:
3-ply: three bonded layers
5-ply: five bonded layers
The stainless steel provides the durable cooking and exterior surfaces, while the internal layers help spread heat more evenly.
That means the question is not simply:
“Is this pan 18/10?”
It is also:
“How is this pan constructed?”
Heritage Steel: One Example of Multiclad Stainless Steel Cookware
Heritage Steel is a family-owned cookware manufacturer in Clarksville, Tennessee, with more than 40 years of experience making specialty multiclad stainless steel cookware in the United States. The company also makes Hammer Stahl cutlery and other kitchen products. Awin _ LangleyGirl _ Advertiser…
That makes Heritage Steel a useful example of why cookware construction deserves as much attention as the numbers stamped on the steel.
Rather than looking only for an 18/10 label, consider how the stainless steel works together with the other layers in the pan.
Note: We are currently evaluating Heritage Steel for inclusion among CookwareTalk’s recommended cookware resources.
That last sentence lets us mention them naturally before affiliate approval without pretending there is already an affiliate relationship.
What Should You Look for When Buying Stainless Steel Cookware?
When comparing pans, I would look at several things together.
Stainless steel composition
18/8 and 18/10 are both widely used choices for kitchen products.
Construction
Look for information about whether the pan is fully clad, how many layers it has, and what materials are used in the core.
Induction compatibility
If you use an induction cooktop, verify that the cookware specifically says it is induction compatible.
Do not assume the interior stainless steel alone tells you that.
Weight
A heavy pan may feel substantial, but heavier is not automatically better if it becomes uncomfortable to lift once it is filled with food.
Choose cookware you can handle comfortably during everyday cooking.
Handles
Look for handles that feel secure and give you enough room to grip the pan comfortably.
Manufacturer transparency
A company that clearly explains its materials and construction makes it much easier to compare one pan with another.
Which Is Best: 18/10, 18/8, or 18/0?
There is no single answer for every part of a pan.
For a cooking surface, 18/8 and 18/10 stainless steels are both commonly used.
For an induction-compatible exterior, a more magnetic stainless steel may be useful.
That is why quality cookware often combines different materials instead of relying on one metal to do everything.
The Bottom Line
The numbers 18/10, 18/8, and 18/0 tell you something useful about the chromium and nickel content of stainless steel.
But they are not a complete cookware quality rating.
When choosing a stainless steel pan, pay attention to the entire construction: the cooking surface, internal layers, magnetic exterior, weight, handles, induction compatibility, warranty, and how clearly the manufacturer explains what you are buying.
Once you understand that, those little numbers on stainless steel cookware become much less mysterious.
How to Care for Cutting Boards: Wood, Plastic, Stainless Steel & Titanium
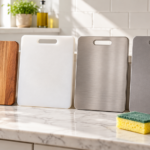
How to Care for Cutting Boards: Wood, Plastic, Stainless Steel & Titanium
A cutting board may seem like one of the simplest tools in your kitchen, but different materials need different kinds of care.
The cleaning routine that works perfectly well for a plastic board may shorten the life of a wooden one. Stainless steel and titanium are generally easy-care surfaces, but they still benefit from proper washing and drying.
The good news? None of this has to be complicated.
Here’s how to care for some of the most common cutting board materials—and a few things you’ll want to avoid.
Why Cutting Board Care Matters
Your cutting board comes into contact with vegetables, fruit, bread, meat, fish, herbs, and just about everything else you prepare.
Regular cleaning helps remove food residue and odors, while proper drying and storage can help prevent warping, staining, and unnecessary wear.
The most important rule is simple:
Wash it. Rinse it. Dry it well. Store it where air can circulate.
The details depend on what your board is made from.
How to Clean a Wood Cutting Board
Wood cutting boards need a little more attention than some other materials, but they can last for years when cared for properly.
After everyday use
Wash the board with warm water, dish soap, and a clean sponge or cloth.
Rinse it well, then dry the surface with a clean towel.
Afterward, allow the board to finish air-drying before putting it away.
What not to do
Avoid leaving a wooden cutting board soaking in the sink.
Too much water can cause wood to swell, crack, or warp over time.
Unless the manufacturer specifically says otherwise, wooden cutting boards should also stay out of the dishwasher. The combination of prolonged water exposure and high heat can be hard on natural wood.
Keep the wood conditioned
When a wooden board starts looking dry or dull, it may be time to condition it with a food-safe cutting board oil, such as food-grade mineral oil.
Follow the board manufacturer’s care instructions, since different wood products may have different recommendations.
Odors and stains
For lingering odors or minor discoloration, start with ordinary soap and water rather than aggressive cleaners.
A gentle baking-soda paste can sometimes help with stubborn odors, but always check the manufacturer’s instructions before trying stronger cleaning methods.
How to Clean a Plastic Cutting Board
Plastic boards are popular because they’re lightweight, inexpensive, and generally easy to maintain.
Wash your plastic cutting board after each use with warm water and dish soap.
Many plastic cutting boards are dishwasher-safe, but check the manufacturer’s instructions first. Heat can warp some thinner boards.
Watch those knife grooves
Plastic gradually develops scratches and grooves from repeated cutting.
Those marks don’t automatically mean you have to throw the board away. But once a board becomes heavily worn, deeply grooved, warped, or difficult to clean thoroughly, replacement may make more sense.
Stains and odors
Plastic can sometimes hold onto the color or smell of strongly colored foods.
Wash stains promptly rather than allowing food residue to sit on the board.
For stubborn discoloration, use only cleaning methods appropriate for that particular board.
How to Clean a Stainless Steel Cutting Board
Stainless steel cutting boards require very little special maintenance.
For everyday cleaning:
- Wash with warm water and dish soap.
- Rinse thoroughly.
- Dry with a soft towel.
Drying the surface instead of simply letting water sit on it can help reduce water spots.
Some stainless steel boards may be dishwasher-safe, but check the manufacturer’s directions before putting yours in the dishwasher.
Avoid overly abrasive cleaning
Heavy scouring pads and harsh abrasive cleaners aren’t usually necessary for everyday cleaning and may leave scratches or change the board’s finish.
A soft sponge or cloth is normally enough.
And because stainless steel can react poorly to prolonged exposure to certain strong chlorine-containing cleaners, don’t assume that stronger automatically means cleaner.
How to Clean a Titanium Cutting Board
One reason titanium cutting boards have attracted attention is their relatively simple care.
For routine cleaning, you generally don’t need an elaborate process.
Wash the board with dish soap and warm water, rinse it, and dry it.
That’s it.
Check the manufacturer’s instructions before putting a titanium cutting board into the dishwasher because construction can vary from one product to another.
Also remember that products marketed as “titanium” aren’t necessarily constructed identically. Some may be solid titanium, while others may use titanium as part of a layered construction or surface treatment.
When in doubt, follow the care directions supplied with your particular board.
Don’t Forget the Edges and Handles
Whichever material you use, don’t clean only the center.
Food and moisture can collect around:
- handles
- grooves
- edges
- corners
- rubber feet
- textured surfaces
Give those areas some attention during normal washing.
A board that looks clean from the top may still have food residue tucked into a groove or along an edge.
Drying Your Cutting Board Matters Too
Washing is only half the job.
After cleaning, don’t put a wet cutting board immediately into a tightly packed cabinet.
Allow air to reach the surface so the board can dry completely.
For wooden boards in particular, standing the board on its edge while it dries can help air reach both sides.
Even nonporous boards benefit from being thoroughly dried before storage.
How Should You Store Cutting Boards?
Store boards somewhere clean and dry.
If possible, avoid stacking a damp board tightly underneath several others.
A cutting board rack or vertical organizer can make storage easier and allow airflow between boards.
If you have several boards, you might also designate different boards for different jobs.
For example, one might be used primarily for produce and another for raw meat or seafood.
When Should You Replace a Cutting Board?
Cutting boards don’t all have an expiration date.
Condition matters more than age.
Consider replacing a board when it becomes:
- badly warped
- cracked or split
- deeply grooved
- difficult to clean
- unstable on the counter
- damaged enough that continued use is inconvenient or unsafe
A solid board that can still be cleaned properly doesn’t need to be discarded simply because it’s old.
Which Cutting Board Is Easiest to Care For?
There isn’t one perfect material for every kitchen.
Wood feels traditional and can last a long time, but it needs hand washing and occasional conditioning.
Plastic is lightweight and convenient but may become heavily scored with use.
Stainless steel is simple to wash and doesn’t require oiling or conditioning.
Titanium also offers relatively straightforward everyday cleaning without the maintenance associated with natural wood.
Your best choice depends on what matters most to you: weight, feel, knife use, maintenance, durability, price, and how you normally prepare food.
If you’re comparing materials before buying your next board, you can also read our guide:
Wood vs. Stainless Steel vs. Titanium Cutting Boards: Which Fits Your Kitchen?
And if you’re wondering specifically about titanium and your knives:
Are Titanium Cutting Boards Bad for Knives? What Home Cooks Should Know
The Bottom Line
Cutting board care doesn’t need to turn into a kitchen science project.
A few simple habits go a long way:
Clean the board after use, don’t leave food sitting on it, dry it thoroughly, store it properly, and follow the manufacturer’s directions for your particular material.
Do that consistently and your cutting board will be much easier to live with—whether it’s wood, plastic, stainless steel, or titanium.
Want an easier way to remember all of this? Get our free Simple Cutting Board Care Guide with at-a-glance care instructions for wood, plastic, stainless steel, and titanium cutting boards.
Lightweight Cookware for Older Adults: What to Look for When Heavy Pans Are Hard to Handle
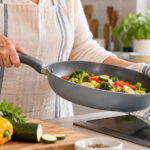
Lightweight Cookware for Older Adults: What to Look for When Heavy Pans Are Hard to Handle
A beautiful pan isn’t very useful if you dread picking it up.
As we get older, cookware weight can start to matter more than it once did. A large skillet that felt perfectly manageable years ago may become awkward when it is filled with food. Heavy lids, thick handles, and oversized stockpots can also make everyday cooking more work than it needs to be.
That doesn’t mean you have to give up good cookware.
The goal is simply to choose pots and pans that are comfortable to lift, easy to control, and practical for the way you cook now.
Here are some of the most important things to consider when shopping for lightweight cookware.
Start With the Weight of the Empty Pan
When cookware shopping, it is easy to focus on size, material, coating, or appearance and forget one very practical question:
How heavy is this pan before I put anything in it?
Remember that the listed weight is only the starting point.
Add water, vegetables, pasta, meat, or sauce, and a manageable pan can quickly become much heavier.
If a skillet already feels cumbersome while empty, it probably won’t become more comfortable once dinner is inside it.
Whenever possible, check the manufacturer’s listed product weight before buying.
If you are shopping in person, pick the pan up and hold it for a few seconds. Pretend you are moving it from the stove to the counter.
That simple test can tell you more than the packaging.
Bigger Is Not Always Better
A large 12- or 14-inch skillet may sound convenient, but bigger cookware usually means more weight.
For one- or two-person households, a smaller pan may handle most everyday cooking jobs while being considerably easier to maneuver.
Instead of buying the biggest cookware available, think about what you actually prepare most often.
A smaller skillet, saucepan, or Dutch oven may be easier to:
- Lift from the stove
- Carry to the sink
- Drain
- Wash
- Store
- Control while stirring or tossing food
Sometimes downsizing the cookware makes cooking easier without really reducing what you can prepare.
Pay Attention to the Handles
Pan weight is only part of the story.
A well-designed handle can make a heavier pan feel easier to control, while an uncomfortable handle can make even a relatively light pan frustrating.
Look for handles that feel secure and provide enough room for a comfortable grip.
For larger pans and pots, a helper handle on the opposite side can be especially useful. Instead of putting the entire load on one wrist, you can lift with both hands.
That can make transferring a full skillet or pot much more manageable.
Don’t Forget the Lid
Lids can be surprisingly heavy.
A sturdy glass lid may be convenient because you can see the food while it cooks, but large glass lids can add noticeable weight.
If cookware weight is important to you, consider the pan with its lid, not just the base.
Ask yourself whether you can comfortably:
- Lift the lid with one hand
- Hold it while stirring
- Move the covered pot
- Wash and store it safely
A lightweight pot with an extremely heavy lid may not solve the problem you were trying to fix.
Which Cookware Materials Tend to Be Lighter?
Cookware weight varies considerably by construction, thickness, and size, so the material alone does not tell the entire story.
Still, there are some general differences worth knowing.
Aluminum
Aluminum cookware is often relatively lightweight and heats quickly.
Some aluminum cookware is anodized or combined with coatings or other materials to improve durability and cooking performance.
If easy lifting is a priority, aluminum-based cookware is worth comparing.
Stainless Steel
Stainless steel cookware can range from reasonably manageable to quite heavy.
Many quality stainless pans contain multiple layers of metal. That construction can improve cooking performance, but additional layers also add weight.
Check the weight of the individual pan rather than assuming all stainless cookware will feel the same.
Cast Iron
Traditional cast iron is extremely durable and holds heat very well, but weight is one of its biggest drawbacks for cooks who want easy-to-handle cookware.
A large cast-iron skillet can become particularly challenging once it is full.
If you love cast iron but struggle with the weight, consider keeping a smaller piece for certain dishes rather than relying on it for every meal.
Carbon Steel
Carbon steel is often lighter than comparable cast iron, although larger pieces can still feel substantial.
It may appeal to cooks who like some of the characteristics of cast iron but want something a little easier to maneuver.
Titanium
Titanium is known for being strong without requiring a lot of weight, but cookware labeled “titanium” can be constructed in very different ways.
Some products use titanium as part of a coating or layered construction rather than being made entirely from titanium.
So if lightweight cookware is your goal, check the actual product weight and construction, not simply the word “titanium” on the label.
Don’t Forget About Your Food-Prep Tools
If you’re considering titanium cookware, see our Tammy Tomato’s Titanium Pan Story for a closer look at titanium pans and what to consider before buying.
And don’t overlook the tools you use before cooking! A cutting board that’s easier to lift, carry, and clean can also make everyday kitchen tasks more manageable.
One partner option worth comparing is the Titan Haus Titanium Cutting Board. Titan Haus lists its smaller 12-by-8-inch board at approximately 1.1 pounds.
Compare the size and weight with your current board to see whether it suits your needs.
Explore the Titan Haus Titanium Cutting Board →
Affiliate disclosure: CookwareTalk may earn a commission if you purchase through this partner link, at no additional cost to you.
Think About What Happens After Cooking
Sometimes we judge cookware only by what happens on the stove.
But after dinner, that pan still has to be carried, emptied, washed, dried, and put away.
That is where lighter cookware can make a noticeable difference.
A pan that is comfortable throughout the entire process may be more useful than a heavier pan with features you rarely need.
Consider your kitchen setup too.
If your pans are stored in a low cabinet or high shelf, weight may matter even more because you have to lift them from an awkward position.
Easy Cleaning Matters Too
Lightweight cookware isn’t much help if it takes extensive scrubbing afterward.
For many older cooks, the ideal pan is one that combines:
manageable weight + comfortable handles + easy cleanup + dependable cooking performance.
That combination may matter more in everyday life than owning the thickest or most expensive cookware available.
Consider Buying Individual Pieces
You don’t necessarily need an entire matching cookware set.
In fact, buying individual pieces can be a smarter approach if weight is one of your main concerns.
You might choose:
- One lightweight everyday skillet
- One smaller saucepan
- One medium pot with two handles
- One larger piece for occasional cooking
That allows you to build a kitchen around the pieces you can comfortably use instead of ending up with several heavy pots sitting unused in a cabinet.
Try the “Full Pan” Test
Here’s a simple shopping test.
When considering a pan, don’t ask only:
“Can I lift this?”
Ask:
“Could I comfortably lift this if it contained dinner?”
Imagine that skillet holding several portions of food or that saucepan filled with water.
That is the weight that matters.
Good Cookware Should Work for You
Cookware doesn’t earn extra points for being difficult to lift.
As our needs change, our kitchens can change with us.
Choosing lighter cookware, smaller sizes, better handles, or easier-to-clean materials isn’t giving anything up. It is simply choosing equipment that makes cooking more comfortable.
Whether you’re cooking for yourself, a partner, grandchildren, or a house full of family, the best cookware is cookware you can use confidently and comfortably.
So before your next cookware purchase, look beyond the brand name and the shiny finish.
Pick it up.
Check the handle.
Notice the lid.
Look at the weight.
And ask the most practical question of all:
Will I enjoy using this pan once it’s full of food?
That answer may tell you more than any product label ever could.
Are Titanium Cutting Boards Bad for Knives? What Home Cooks Should Know
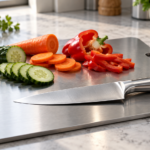
Are Titanium Cutting Boards Bad for Knives? What Home Cooks Should Know
Titanium cutting boards are getting attention from home cooks who want a durable, easy-to-clean alternative to wood and plastic. But before switching to a metal cutting surface, there’s an important question to ask:
Are titanium cutting boards bad for knives?
The short answer is: they can cause a knife edge to wear faster than a softer cutting surface such as wood or some plastics. That doesn’t mean a titanium cutting board will immediately ruin your knives. How quickly a blade dulls depends on the board’s construction, your knife, how often you cook, and the way you cut.
Here’s what home cooks should know before deciding whether titanium belongs in the kitchen.
Why Cutting Board Material Matters
Every time you slice, chop, or mince, the edge of your knife eventually makes contact with the cutting board.
Softer cutting surfaces have a little more give when the blade reaches them. Harder, more rigid surfaces give less, which means more of the impact is absorbed by the knife edge.
That is one reason many cooks prefer wood when protecting sharp knives is a priority.
Titanium is a rigid metal surface, so it does not provide the same cushioning effect as a traditional wooden cutting board.
Will a Titanium Cutting Board Ruin Your Knives?
Not necessarily.
There is an important difference between gradual edge wear and actually damaging a knife.
Using a titanium board does not mean your chef’s knife will suddenly become unusable after preparing dinner. However, if you do a lot of heavy chopping, you may find that your knives need honing or sharpening more often than they would when used on a softer surface.
Your cutting style matters too.
A smooth slicing or rocking motion is generally easier on a knife edge than repeatedly striking the board with a forceful chopping motion.
Titanium vs. Wood for Knife Care
If keeping your knives sharp for as long as possible is your top concern, wood remains one of the most knife-friendly choices.
Wood has some natural give, particularly compared with very rigid materials.
Titanium, on the other hand, may appeal to cooks for different reasons. Depending on the particular board, advantages may include:
- A nonporous surface
- Resistance to absorbing odors
- Easy cleanup
- Resistance to staining
- Durability
- An alternative for cooks trying to reduce their use of plastic cutting boards
That makes the decision less about finding one “perfect” cutting board and more about deciding which features matter most in your kitchen.
Is Titanium as Hard on Knives as Glass or Stone?
Glass, ceramic, marble, and stone cutting surfaces are generally poor choices for protecting knife edges because they are extremely rigid and unforgiving.
Titanium should not automatically be treated as identical to glass or stone. Titanium grades and board construction can vary considerably.
That is also why it is worth checking exactly what a manufacturer means by “titanium cutting board.” Some products may be solid titanium, while others may use titanium as part of a layered or coated construction.
If protecting a finely sharpened knife is your number-one concern, a quality wooden board remains the safer choice.
Can You Use Both Wood and Titanium?
Absolutely.
You do not have to choose one cutting board for every kitchen task.
A wooden board can be used for jobs involving lots of chopping and slicing, while a titanium board can be reserved for food-prep jobs where its nonporous, easy-care surface is especially convenient.
Using different boards for different jobs may give you the advantages of both materials.
How to Reduce Knife Wear on a Titanium Cutting Board
If you decide a titanium board fits your kitchen, a few habits may help protect your knives.
Use a smooth slicing or rocking motion instead of striking the board unnecessarily hard.
Keep your knives properly honed and sharpened rather than waiting until they become extremely dull.
Use the right knife for the job, especially when doing heavier chopping.
And pay attention to how your particular knives respond. If you notice that one of your favorite knives is losing its edge much faster, consider using a softer cutting board for that knife.
Are Titanium Cutting Boards Worth It?
That depends on what matters most to you.
If your first priority is maintaining a finely sharpened knife edge, wood is difficult to beat.
If you place more value on having a durable, nonporous, low-maintenance cutting surface, a titanium board may still deserve a place in your kitchen—as long as you understand that your knives may need a little more maintenance.
Titanium cutting boards are not automatically “bad” for knives, but they do come with a tradeoff.
The best cutting board is the one that fits how you actually cook, clean, and care for your kitchen tools.
Want to Compare Your Options?
Still deciding?
Read our guide to Wood vs. Stainless Steel vs. Titanium Cutting Boards: Which Fits Your Kitchen? to compare the materials side by side.
If you’ve decided a titanium cutting board fits your kitchen, compare current Titan Haus options here.
Disclosure: CookwareTalk may earn a commission from qualifying purchases made through affiliate links, at no additional cost to you.
Best Induction Cookware for Even Heat (2026)
Best Induction Cookware: Quick Recommendations
The best induction cookware starts with a flat, magnetic base that matches the size of your cooktop’s cooking zone. Construction matters too: a well-made pan with a substantial base can help spread heat more evenly and respond predictably to changes in power.
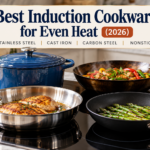
There is no single cookware material that is best for every job. Fully clad stainless steel is a strong all-purpose choice, enameled cast iron excels at heat retention, carbon steel works well for high-heat cooking, and induction-compatible nonstick can be useful for delicate foods.
Rather than ranking cookware we have not personally tested, this guide compares the materials, construction styles, and features that are most useful when shopping for induction cookware.
| Cookware Type | Best For | Key Benefit on Induction |
|---|---|---|
| Fully Clad Stainless Steel | Everyday versatility | Can provide responsive, even heating when paired with an induction-compatible magnetic exterior. |
| Enameled Cast Iron | Soups, stews, braising, and searing | Excellent heat retention and naturally compatible with induction. |
| Carbon Steel | High-heat frying and browning | Magnetic, responsive, and can develop a relatively nonstick cooking surface when properly seasoned. |
| Induction-Compatible Nonstick | Eggs, fish, and delicate foods | Easy food release when the pan includes a magnetic induction-compatible base. |
When shopping for induction-compatible cookware, look for a flat bottom, an induction symbol or manufacturer statement confirming compatibility, and a base that closely matches the cooking zone you plan to use. Very thin cookware may be more prone to uneven heating or warping. Some cookware may also hum or buzz on induction, especially at higher power settings, and that sound is not necessarily a sign that something is wrong.
What Makes a Pan Work on an Induction Stove?
Induction cooktops use copper coils beneath the glass surface to create a changing magnetic field. When compatible cookware is placed over the cooking zone, that field induces electrical currents in the magnetic portion of the pan and generates heat directly in the cookware.
For induction to work, the cookware must contain enough ferromagnetic material in its base. This is why some stainless steel pans work beautifully on induction while others do not.
Cookware may use 18/10 or other 300-series stainless steel on the interior cooking surface while incorporating a different magnetic stainless steel layer or base underneath. That combination can provide the corrosion resistance of stainless steel along with induction compatibility.
| Metal Type | Induction Compatible? | What to Know |
|---|---|---|
| Cast Iron and Carbon Steel | Generally Yes | These iron-rich materials are naturally magnetic and usually work well on induction. |
| Magnetic Stainless Steel | Usually Yes | Many induction-ready pans use a magnetic stainless steel exterior or base. |
| 300-Series Stainless Steel such as 18/10 | Depends on Construction | 18/10 stainless by itself may be weakly magnetic or nonmagnetic, but it can be used in cookware that includes a separate magnetic induction-compatible layer. |
| Pure Aluminum and Copper | No, by themselves | These materials normally need a bonded magnetic base or layer to work on induction. |
A refrigerator magnet provides a quick compatibility test. Hold the magnet against the flat outer bottom of the pan. A strong attraction is a good sign that the cookware may work on induction. You can also look for the induction symbol on the cookware or check the manufacturer’s specifications.
Pan size matters too. Some cooktops will not recognize cookware if the magnetic portion of the base is too small for the selected cooking zone.
Fully Clad vs. Impact-Bonded Bases on Induction
Passing the magnet test tells you that a pan can interact with an induction burner, but cookware construction can also affect how heat moves through the pan.
Fully clad cookware typically bonds conductive material such as aluminum between layers of stainless steel across the bottom and up the sidewalls.
Impact-bonded or disc-bottom cookware concentrates its layered construction in the base of the pan. A well-made bonded base can perform very well on induction, particularly for boiling, steaming, and other cooking tasks where sidewall heat distribution is less important.
Neither construction automatically guarantees excellent or poor performance. Thickness, materials, manufacturing quality, pan size, and how closely the base matches the induction element can all affect results.
| Feature | Fully Clad Pans | Impact-Bonded Base Pans |
|---|---|---|
| Layered Construction | Usually extends from the bottom up the sidewalls | Concentrated mainly in the base |
| Sidewall Heating | Can distribute heat farther up the sides | Most heat distribution occurs through the bottom |
| Induction Compatibility | Works when the exterior or base is sufficiently magnetic | Works when the bonded base contains enough magnetic material |
| Best Fit | Useful for cooks wanting versatile, all-around heat distribution | Can be a practical choice for boiling, steaming, and everyday cooking |
How Induction Cookware Materials Compare
Different materials respond differently to heat. Thickness and construction matter just as much as the name of the material, so treat these comparisons as general guidelines rather than absolute rules.
| Cookware Material | Heating Response | Cooktop Considerations | Best Kitchen Use |
|---|---|---|---|
| Fully Clad Stainless Steel | Responsive; varies by core and thickness | Use an induction-compatible version with a smooth, flat magnetic base | Everyday searing, boiling, sautéing, and pan sauces |
| Enameled Cast Iron | Slower to change temperature but retains heat well | Heavy cookware should be lifted rather than dragged across the glass | Braising, slow-simmered stews, soups, and baking |
| Carbon Steel | Responsive, depending on thickness | Keep the base clean and lift rather than slide the pan | High-heat searing, stir-fries, browning, and crisping |
| Induction-Compatible Nonstick | Often responsive | Confirm that the base is magnetic and follow the coating manufacturer’s heat recommendations | Eggs, delicate fish, pancakes, and quick reheating |
Whatever material you choose, keep both the cookware base and the cooktop clean. Small particles trapped between a pan and the glass can contribute to scratches, especially if cookware is dragged rather than lifted.
Top Cookware Categories for Induction Cooking
Different cooking jobs call for different cookware. These three categories cover many everyday induction cooking needs.
1. Fully Clad Stainless Steel Sets
Induction-compatible multi-ply stainless steel is a versatile choice for sautéing, boiling, browning, and making pan sauces. Look for a flat magnetic exterior and construction substantial enough to remain stable during rapid temperature changes.
2. Enameled Cast Iron Dutch Ovens
Cast iron is naturally magnetic and works well with induction. Its high heat capacity makes it useful for braises, soups, stews, and other dishes that benefit from steady heat.
Because cast iron is heavy, set it down gently and lift it when moving it across a glass cooktop. Check the bottom of the cookware for rough areas before use.
3. Carbon Steel Skillets
Carbon steel combines magnetic compatibility with relatively responsive heating. It is well suited to searing, browning, stir-frying, and other high-heat techniques.
Choose a well-made pan with a flat base and follow the manufacturer’s recommendations for preheating and seasoning.
| Cookware Category | Best Kitchen Role | Key Induction Advantage |
|---|---|---|
| Fully Clad Stainless | Everyday sautéing, pan sauces, and boiling | Versatile construction with good heat distribution when properly designed for induction |
| Enameled Cast Iron | Braising, baking, and slow cooking | Excellent heat retention and natural magnetic compatibility |
| Carbon Steel | Searing, stir-fries, browning, and crisping | Magnetic material with responsive heating |
How to Fix Common Induction Cookware Problems
Even compatible cookware can sometimes hum, fail to register, heat unevenly, or leave marks on a glass cooktop. Here are some practical things to check.
| Problem | Possible Cause | What to Try |
|---|---|---|
| Buzzing or humming sound | Some cookware can vibrate or hum when interacting with the induction field, particularly at high power. | If cooking performance is normal, some sound may be expected. Try reducing the power setting. Check your cooktop manual if the sound is unusually loud or accompanied by an error. |
| Burner will not turn on | The cookware may not be magnetic enough, may be too small, or may not be centered correctly. | Test the base with a magnet, center the pan over the cooking zone, and use a pan that meets your cooktop’s minimum size requirements. |
| Scratched glass cooktop | Dragging cookware or moving a pan over grit or food particles can scratch the surface. | Keep the pan bottom and glass clean and dry, and lift cookware rather than sliding it. Follow your cooktop manufacturer’s care instructions. |
| Warped pan bottom | Extreme overheating or rapid temperature changes can contribute to warping. | Avoid heating an empty pan at maximum power unless the cookware manufacturer specifically recommends it. Let very hot cookware cool before exposing it to cold water. |
Induction can heat compatible cookware very quickly. Start with moderate settings until you learn how your particular cookware responds, and follow both the cookware manufacturer’s and cooktop manufacturer’s instructions.
Frequently Asked Questions About Induction Cookware
How do I test if my current cookware works on induction?
Hold a refrigerator magnet against the flat underside of the pan. If it sticks firmly, that is a good indication that the cookware contains enough magnetic material for induction. You can also look for the induction symbol or confirm compatibility with the cookware manufacturer.
Can you use cast iron on induction without scratching the glass?
Yes. Cast iron is generally induction compatible. Because it is heavy and some bases can be rough, keep both surfaces clean and lift the pan rather than sliding it across the cooktop. Follow the cooktop manufacturer’s care recommendations.
Does all stainless steel cookware work on induction stoves?
No. Induction requires a sufficiently magnetic base. Some stainless steel cookware is magnetic and some is not. A pan can also combine an 18/10 stainless steel cooking surface with a separate magnetic exterior or bonded base designed for induction.
Are induction converter interface discs worth using?
Converter or transfer discs can allow some non-magnetic cookware to be used on induction, but they may reduce the efficiency and responsiveness that make induction attractive. They can also become very hot. Some cooktop manufacturers do not recommend them, so check your appliance manual before using one.
Helpful Cookware Guides from CookwareTalk
If you are comparing cookware materials or learning how to get better results from stainless steel, these CookwareTalk guides can help.
| Guide | What It Covers | Why Read It |
|---|---|---|
| What Does 18/10 Stainless Steel Mean? | What 18/10, 18/8, and 18/0 stainless steel numbers actually describe. | Understand stainless steel composition before comparing cookware. |
| Why Food Sticks to Stainless Steel | Why food can stick and how preheating, temperature, and technique affect cooking. | Get better results once you start cooking with stainless steel. |
| Tomatoes, Acidic Foods, and Cookware Materials | How different cookware materials interact with acidic foods. | Choose cookware based on both the heat source and the foods you cook. |
Before replacing an entire cookware collection, test the pans you already own. A magnet, the induction symbol, and the manufacturer’s specifications can quickly tell you which pieces may already be ready for your induction cooktop.
Before You Buy That Stainless Steel Pan: What 18/10, 18/8 and 18/0 Really Mean
Before You Buy That Stainless Steel Pan: What 18/10, 18/8 and 18/0 Really Mean
You’re comparing two shiny stainless-steel pans.
One says 18/10 stainless steel.
Another says 18/8.
Then you find a third marked 18/0.
So naturally, 18/10 must be the best one, right?
Not necessarily.
And here’s the first surprise: those numbers do not tell you how thick, heavy or heavy-duty the pan is.
They describe the approximate makeup of the stainless-steel alloy—specifically its chromium and nickel content. British Stainless Steel Association
Once you understand that, stainless-steel labels start making a lot more sense.
What Does 18/10 Stainless Steel Mean?
In the familiar shorthand used on stainless-steel kitchen products, the first number refers to chromium and the second refers to nickel.
So the labels generally mean:
| Stainless label | Chromium | Nickel | Common association |
|---|---|---|---|
| 18/10 | about 18% | nominally about 10% | commonly 304-type stainless |
| 18/8 | about 18% | about 8% | commonly Type 304 stainless |
| 18/0 | roughly 17–18% | little or no nickel | commonly Type 430 stainless |
Chromium is a major reason stainless steel resists corrosion. It helps form a thin protective passive layer on the surface of the steel.
Nickel changes the steel’s structure and characteristics and is one of the alloying elements associated with the familiar 304 family of stainless steel. British Stainless Steel Association
So far, pretty straightforward.
Then cookware marketing makes things a little more interesting.
18/10 vs. 18/8 Stainless Steel: Is One Actually Better?
You might expect 18/10 to be a completely different—and automatically superior—steel compared with 18/8.
That isn’t necessarily the case.
The British Stainless Steel Association says 18/8 is commonly associated with Type 304 stainless steel, and that the consumer designation 18/10 is also commonly used for essentially the same 304 family. In other words, an 18/10 label by itself does not prove that the cookware is made from a fundamentally superior grade of steel. British Stainless Steel Association
That matters when you’re standing in front of two pans and one costs considerably more because the packaging makes a very big deal out of 18/10.
Could there be differences between the pans?
Absolutely.
But the numbers alone don’t tell you enough to determine which pan will cook better.
So What Is 18/8 Stainless Steel?
18/8 is one of the familiar names for Type 304 stainless steel.
Type 304 belongs to the austenitic family of stainless steels and is widely used in kitchen and food-related applications. It is generally nonmagnetic or only weakly attracted to a magnet. British Stainless Steel Association
That last part sometimes causes confusion when people start shopping for induction cookware.
You may hear:
“If a magnet doesn’t stick to stainless steel, it won’t work on induction.”
That can be true of an individual layer of steel—but cookware can contain several different layers.
Which brings us to 18/0.
Where Does 18/0 Stainless Steel Fit In?
18/0 stainless steel contains little or no nickel and commonly refers to a ferritic stainless such as Type 430.
Unlike 304-type stainless, ferritic 430 is magnetic.
It also generally has lower corrosion resistance than 304, but that does not mean it is simply “bad stainless steel.” It has different characteristics and can be useful in applications where magnetism is desirable. British Stainless Steel Association
And cookware is a perfect example of why that can matter.
An induction-compatible pan needs a magnetic component somewhere in its construction.
So a manufacturer may combine different materials or types of steel rather than making the entire pan from one alloy.
One Pan Can Contain Several Materials
This is where the number stamped on the box stops telling the whole story.
Modern stainless cookware is often clad, meaning layers of different materials are bonded together.
For example, a stainless pan may include stainless-steel surfaces surrounding an aluminum core. Aluminum conducts heat much more effectively than stainless steel, so manufacturers use layered construction to combine the durability of stainless with more even heat distribution.
As one real-world example, Demeyere describes its Industry cookware as 5-ply, with an aluminum core and stainless-steel construction, while also labeling the cookware 18/10 stainless steel. Zwilling
That tells us something important:
The stainless-steel grade is only one part of the cookware story.
You also want to know what is inside the pan.
What Those Stainless-Steel Numbers Do NOT Tell You
Seeing 18/10 on a pan does not tell you:
- how thick the pan is
- how heavy it is
- how thick the aluminum or copper core may be
- whether it is 3-ply, 5-ply or another construction
- how evenly it heats
- how comfortable the handle is
- whether it will warp easily
- how well it performs on your particular stove
That’s why comparing cookware strictly by the biggest-looking stainless-steel number can be misleading.
A thoughtfully constructed 18/8 pan could easily be a better purchase for your kitchen than a poorly designed pan that happens to advertise 18/10 in giant letters.
Does 18/10 Stainless Steel Work on Induction?
Sometimes yes—and this is another reason not to judge the entire pan by one number.
304-type 18/8 or 18/10 stainless is generally not strongly magnetic. But manufacturers can design the pan with another magnetic layer or induction-compatible base.
There are commercially available 18/10 stainless-steel pans that are fully induction compatible because of their overall construction. Zwilling
So when shopping for induction cookware, check whether the finished pan is rated for induction rather than trying to decide based solely on the 18/10 label.
Can You Use a Magnet to Identify Your Stainless Steel?
A magnet can give you a clue.
Ferritic steels such as Type 430 are magnetic, while annealed 304-type stainless is generally nonmagnetic or weakly magnetic. British Stainless Steel Association
But don’t turn the refrigerator magnet into your home metallurgy laboratory.
Manufacturing and working the metal can affect how strongly some stainless responds to a magnet, and a multilayer pan may contain more than one type of steel.
The magnet test tells you something.
It doesn’t tell you everything.
Before You Buy, Ask Better Questions
Rather than asking only:
“Is this 18/10?”
try asking:
What stainless steel is used on the cooking surface?
Is the cookware fully clad or only disc-bottomed?
What material is used in the heat-conducting core?
Is it induction compatible if I need induction?
How is the pan constructed overall?
Those answers tell you much more about what you are actually buying.
The CookwareTalk Bottom Line
The numbers aren’t a secret quality score.
18/8 commonly points to Type 304 stainless steel.
18/10 is frequently used for stainless in that same general 304 family and should not automatically be treated as proof that a product is better.
18/0 commonly points toward ferritic stainless such as Type 430, which contains little or no nickel and is magnetic. British Stainless Steel Association
The biggest lesson?
Read the pan, not just the number.
The alloy matters—but so do the layers, core, thickness, construction and intended use.
So the next time a shiny package announces 18/10 STAINLESS STEEL as though you’ve just discovered the Rolls-Royce of frying pans, you’ll know what to ask next:
“Okay…but what else is this pan made of?”
And that’s when you’re shopping like a CookwareTalk reader. 😄
Read next
Having trouble with food sticking to your stainless-steel pan?
👉 Why Does Food Stick to Stainless Steel? The Heat Mistake Most Home Cooks Make
And if you want to see what happens when cookware materials meet acidic foods: